Hello from another year older and wiser. The blog has turned 5 as of Cinco de Mayo! It’s a darn shame we’re all stuck indoors because I wanted to have a reader thank you party called the Cinco de Darling, but since we can’t gather I figured I would share this classic birthday cake with fudge icing and announce 5 days of giveaways happening over on Instagram.
Look I’ll admit, there are prettier cakes on the internet, but every time I make an internet cake it turns out wrong. The cake too heavy, the frosting too sweet, the time never right. Until I took the recipe from the back of the King Arthur Cake Flour box and voila, a perfect cake was born.
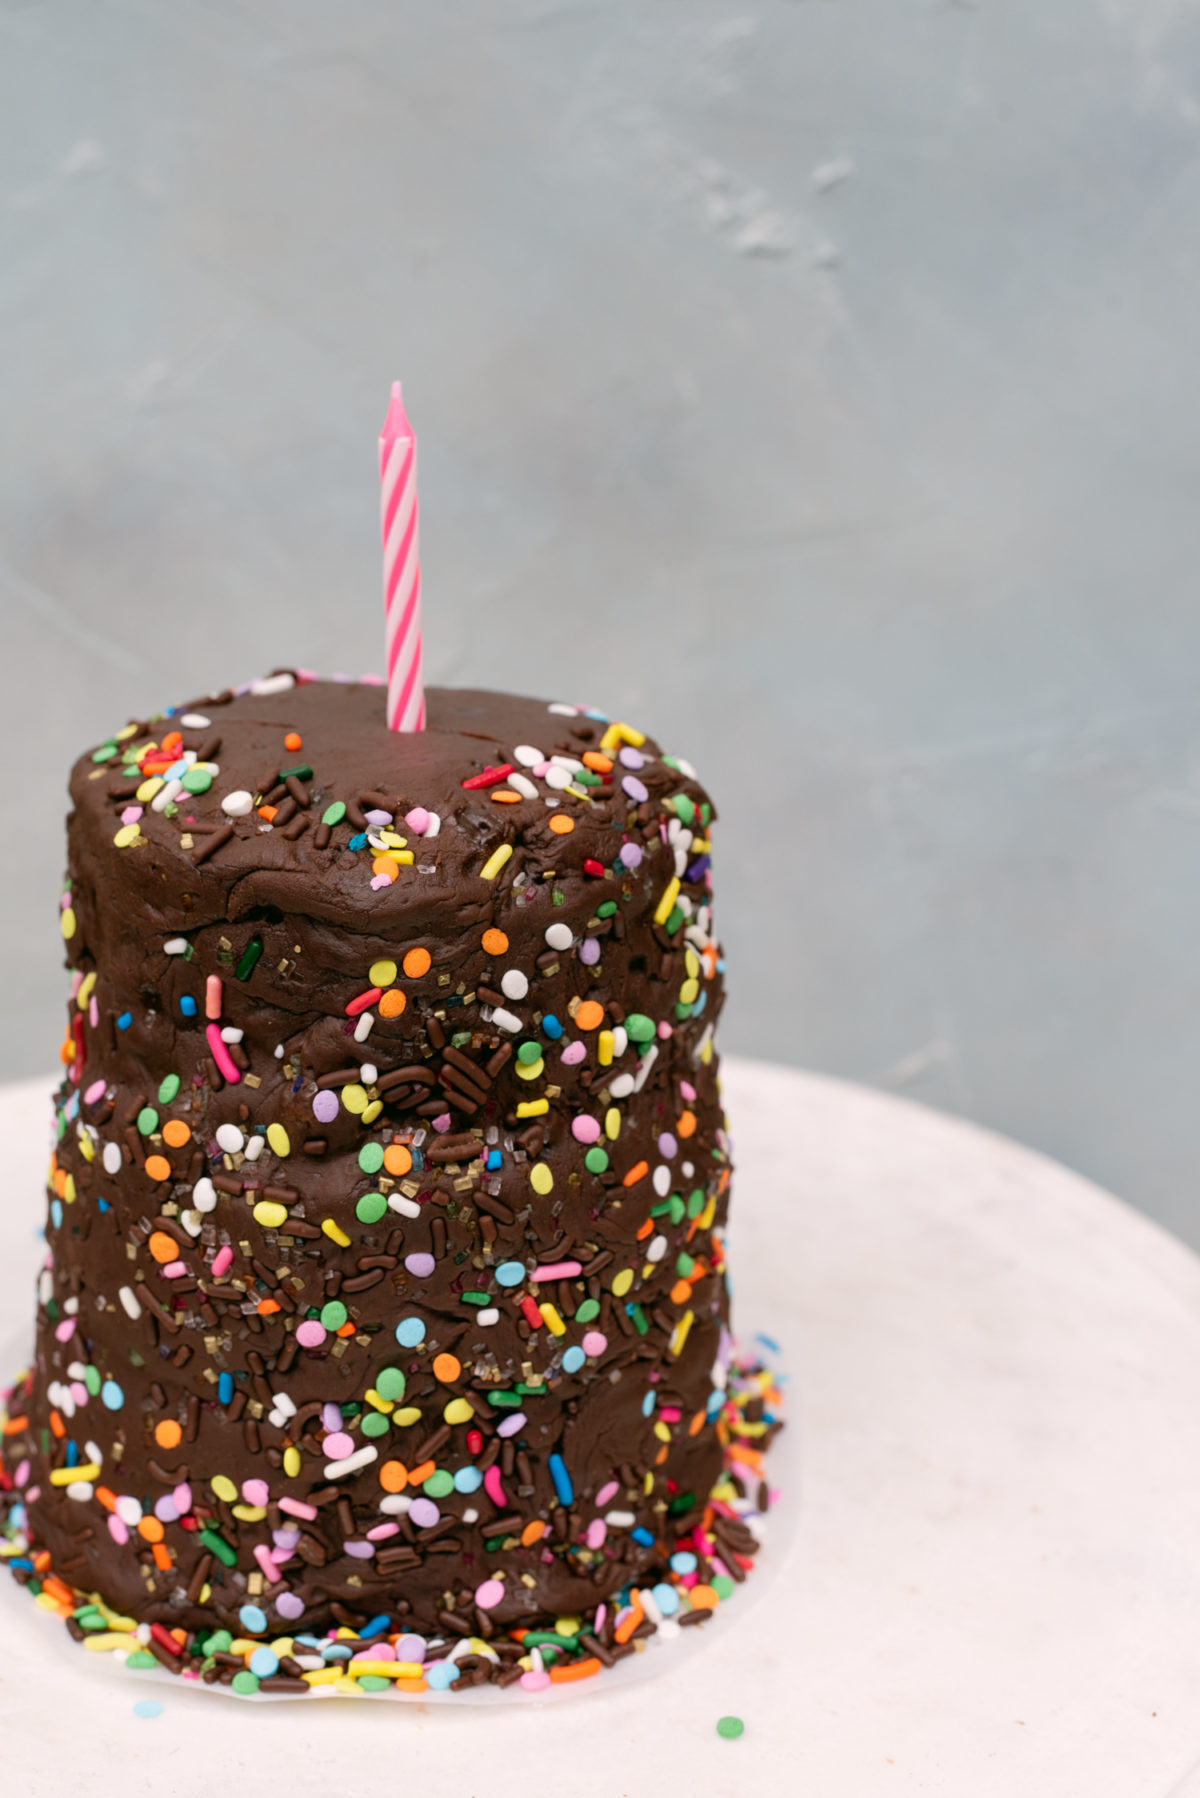
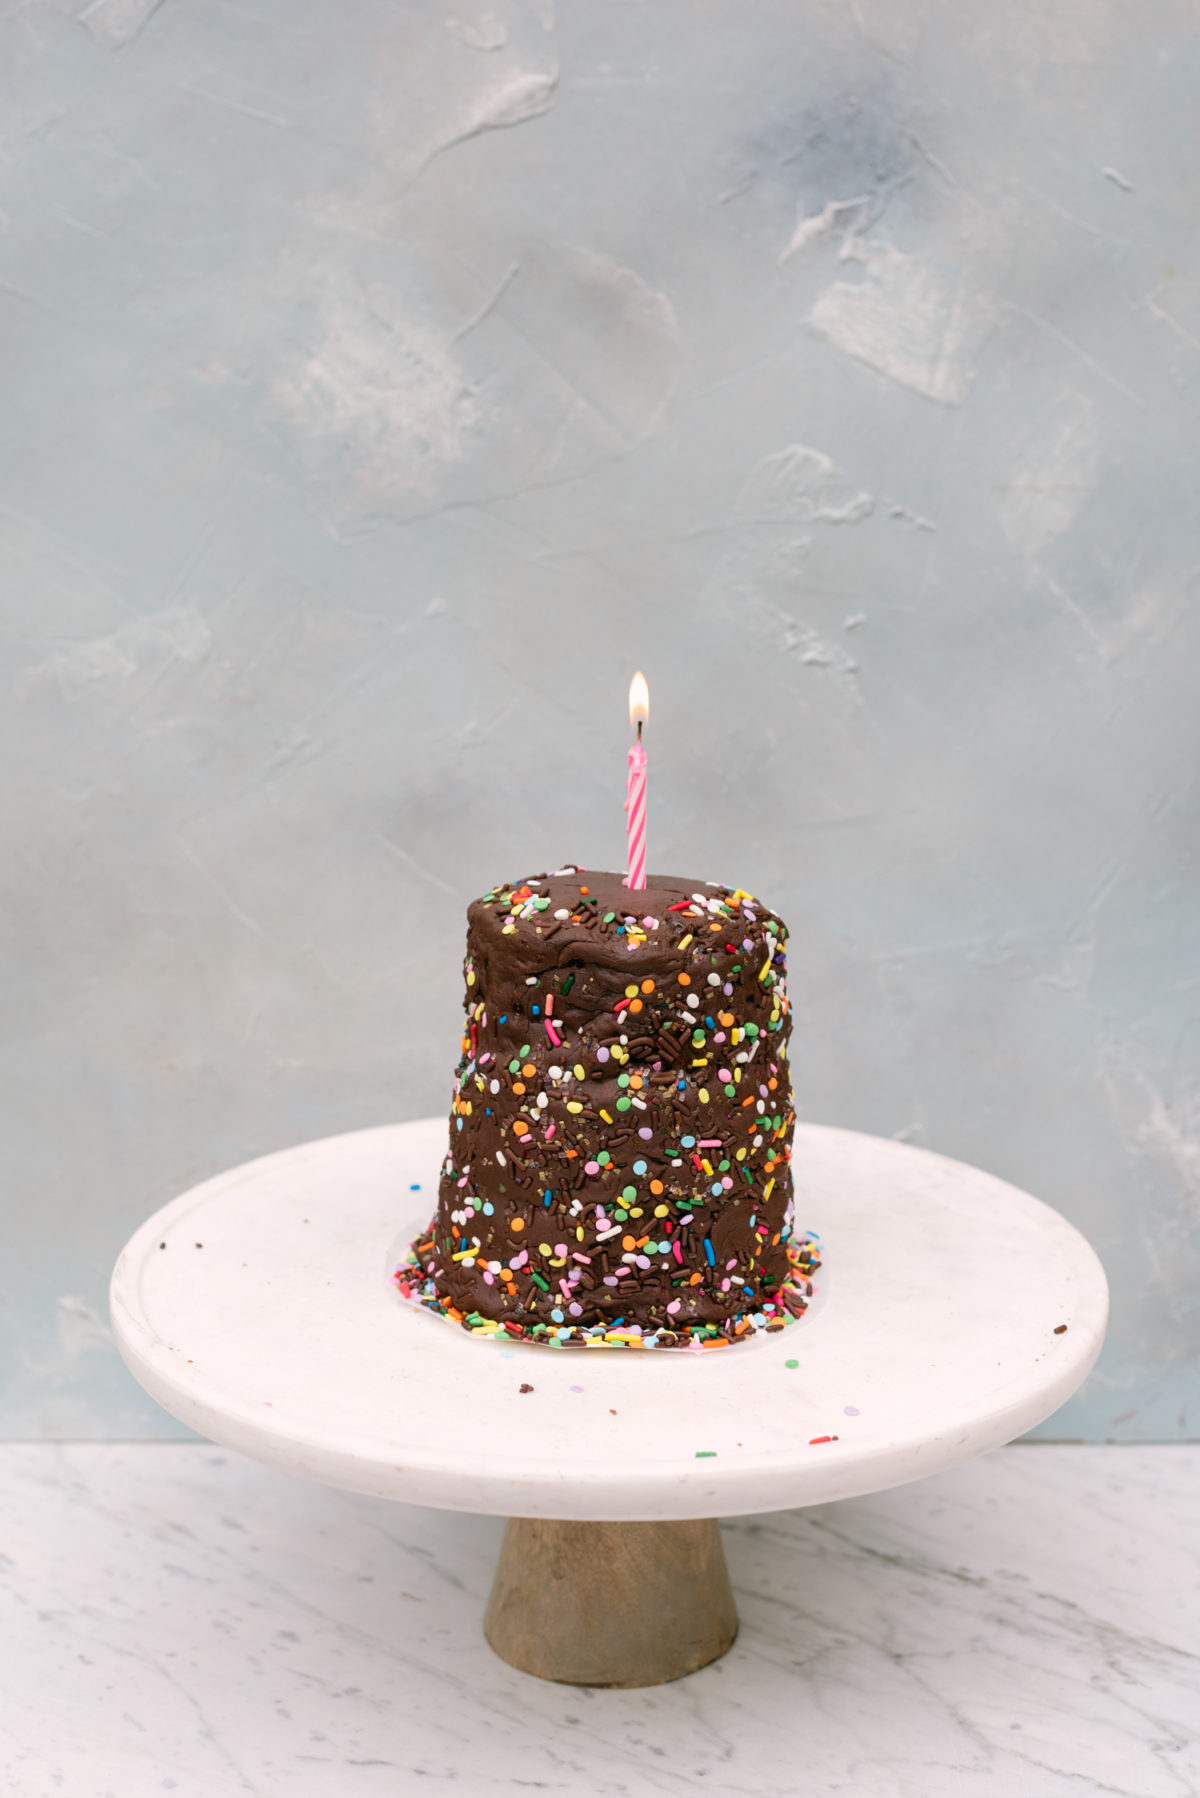
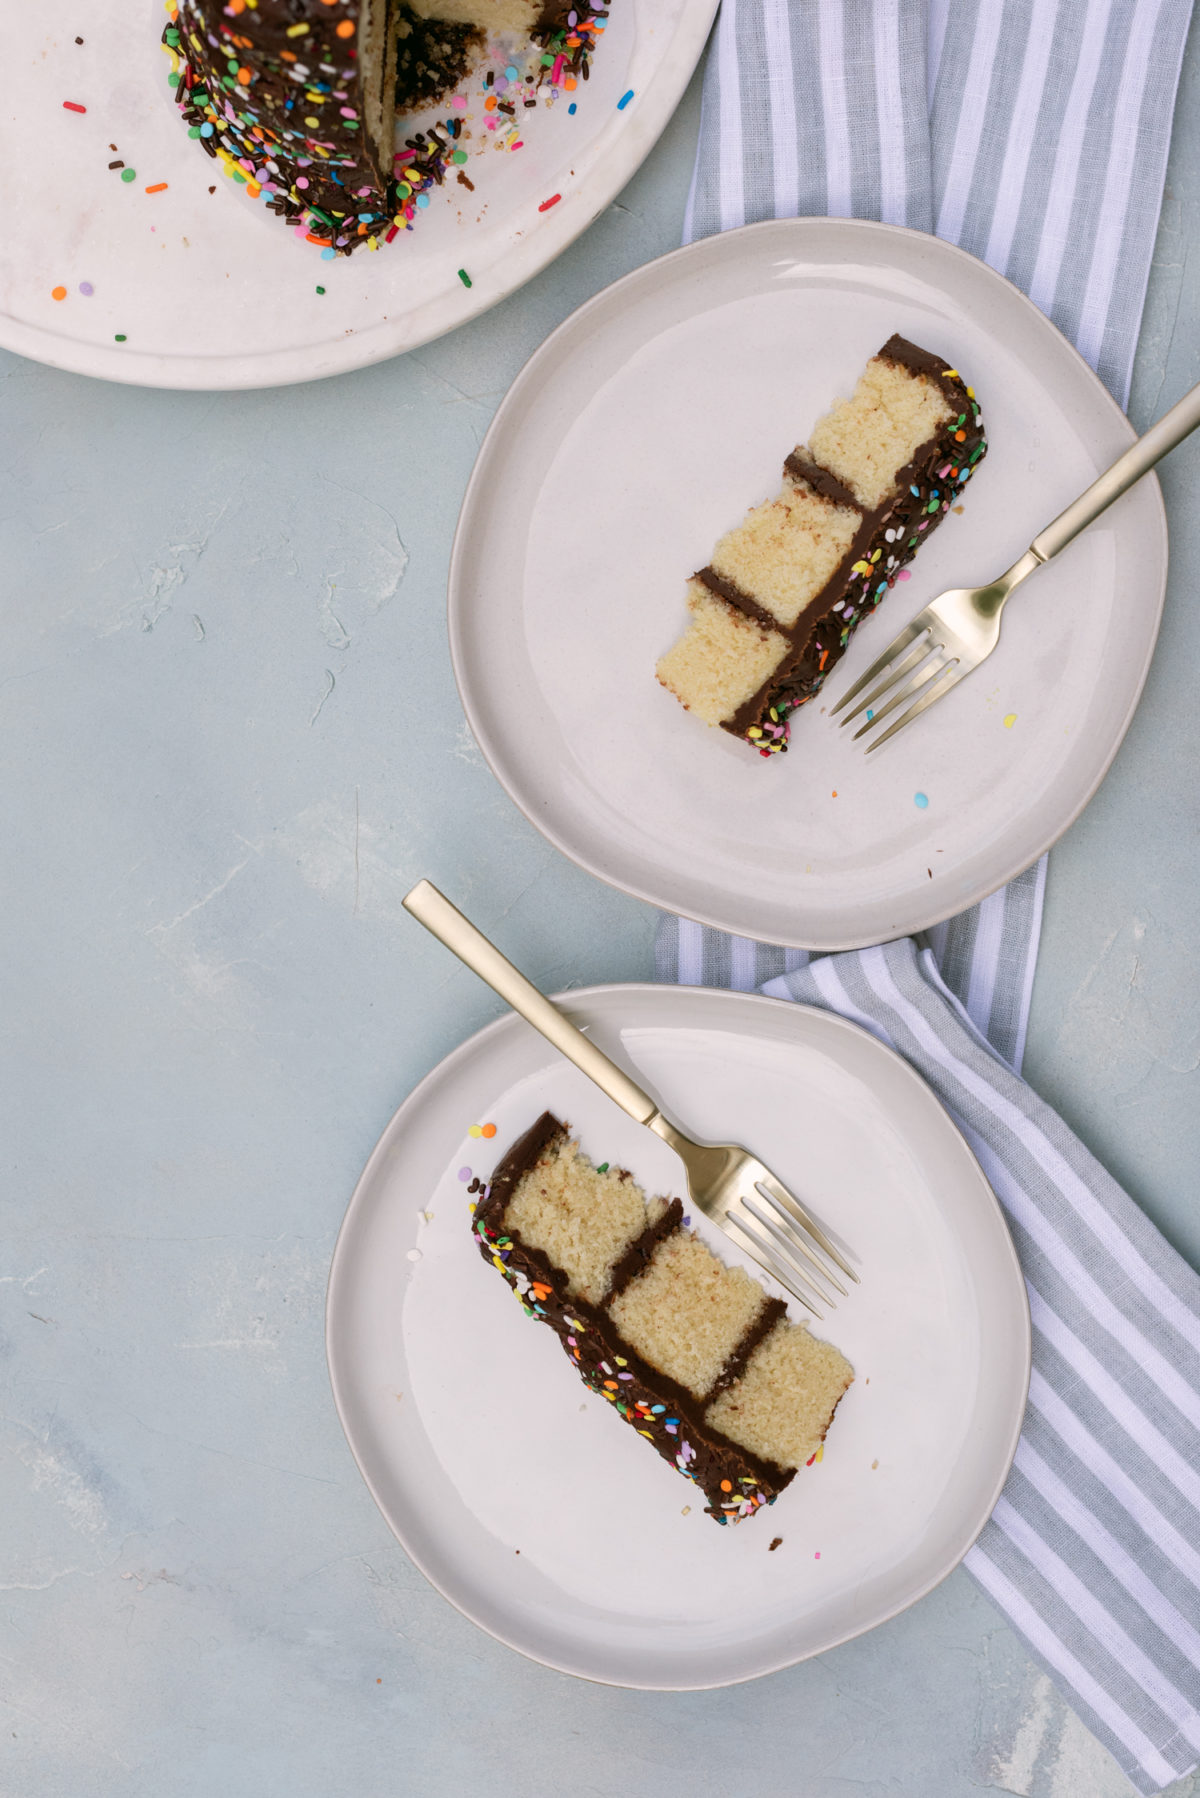
She doesn’t stand straight but this is your perfect cup of porage, Goldilocks. If you’re looking for a homemade version of that classic birthday cake with fudge icing, this is your gal.
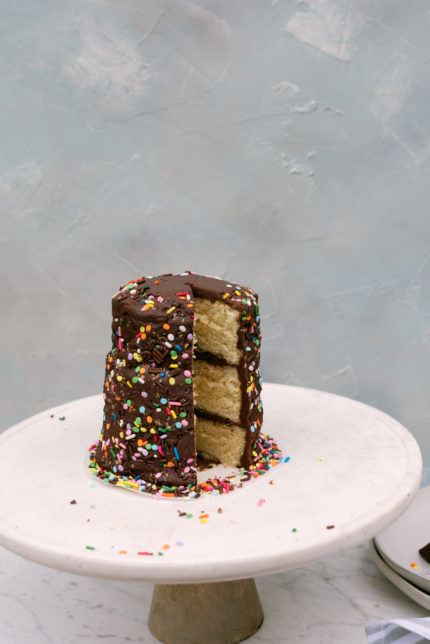
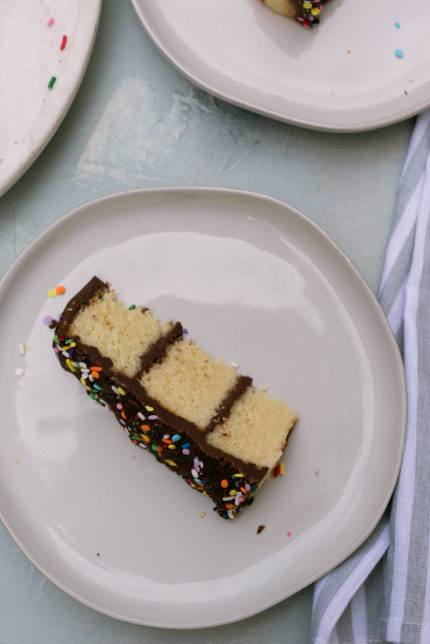
Plus because you made this from scratch you feel extra accomplished for getting that perfect bakery-quality crumb every time you bite into this delightfully rich cake.
To know something about me personally is that I hate waste, which is why I used 3 of these 4″ Springform pans to make a tiny stacked cake perfect for two people, or one person who wants to eat a cake all to themselves.
Now, to address the elephant in the post, the 5 year anniversary! It’s crazy to think this little parcel of coding turned into something way bigger than I imagined. And now, after 5 amazing years of working on this platform, I want to give back to you all which is why I’m hosting 5 days of giveaways over on Instagram! Each day all you have to do is comment and tag a friend on that day’s post. The giveaways will be getting better in value as each day passes but each one is so good!
So thank you all for the continued support! I love being able to create for you.

That right from the box yellow cake perfection with classic Duncan Hines inspired fudge icing, but you made it at home so GO YOU! P.S. Listing the brands because these are my tried and true kitchen favorites, they are not required. The only thing that is required is the King Arthur Flour because in my experience, it is the most amazing home baker flour on the market.
- 1 cup King Arthur Unbleached Cake Flour sifted
- 1/2 tsp salt
- 1 tsp Clabber Girl baking powder
- 2 large eggs room temperature
- 1 cup granulated sugar
- 1/2 TBSP Nielsen Massey Vanilla Extract
- 1/2 cup organic whole milk
- 2 TBSP unsalted butter cut into pats
- 1/6 cup organic canola oil
- 1/2 cup unsalted butter
- 1/2 cup Belgian cocoa powder sifted (I like Cocoa Metro)
- 3+ cups powdered sugar sifted
- 1/3 + cups whole milk
- 3/4 TBSP Nielsen Massey Vanilla Extract
- 1 pinch kosher salt
-
Preheat oven to 325°F with a rack in the center of the oven. If using the little spring form pans, spray with baking pam to keep the cakes from sticking.
-
In a small bowl, combine flour, baking powder, and salt. Set aside.
-
In a large stand mixer with a whisk attachment, beat the eggs, sugar, and vanilla until light gold colored and thickened. Should take about 2 minutes at medium high speed. DO NOT OVER BEAT.
-
Turn the speed down low and slowly add the dry mixture. Mix just enough to combine. Scrape down the sides of the bowl and then mix again briefly.
-
In a saucepan over medium heat, simmer the milk. Remove pan from heat and add butter and oil, stirring until butter has melted.
-
Slowly mix the hot milk-butter-oil mixture into the batter, stirring on low speed until everything is well combined.
-
Divide the batter between the mini spring form pans so that it comes to 3/4's of the way to the top. If there is extra batter, fill a ramekin or a cupcake mold with the batter and enjoy later.
-
Bake for approximately 25-28 minutes. You want the top of the cakes to be golden honey in color and when a toothpick is inserted for it to come out clean.
-
Once cooked, remove from oven, set on a cooling rack and cool for 5 minutes before removing from springform pans.
-
Remove from springform pans and let cool completely (about 30 minutes) before frosting.
-
Melt the butter in a medium saucepan over medium heat.
-
Add the cocoa powder and whisk until lumps are dissolved, will be a thick and tacky mass.
-
Alternate adding 1/4 of the milk and 1/4 of the powdered sugar until all of the milk is added and most of the powdered sugar. The consistency needs to be like thick pancake batter and stick to the back of a spoon. Once consistency is reached, remove from heat.
-
Stir in the vanilla extract.
-
When the frosting is still warm, frost your completely cool cakes. If stacking your cakes, put a dollop of frosting on the bottom of the base layer to help the cake stick to your surface to frost.
-
If the frosting starts to harden as you work, plop it over the oven for a moment to reheat it.
-
Moving quickly, frost your cake and decorate to your liking. Since the cakes are completely cool once you assemble your cake, no need to wait anytime to eat it.
As I said above, this recipe does not need the exact brands I use, they're just listed because they are the brands I love to use in my kitchen and I always find that the quality is one that I can continuously trust.