
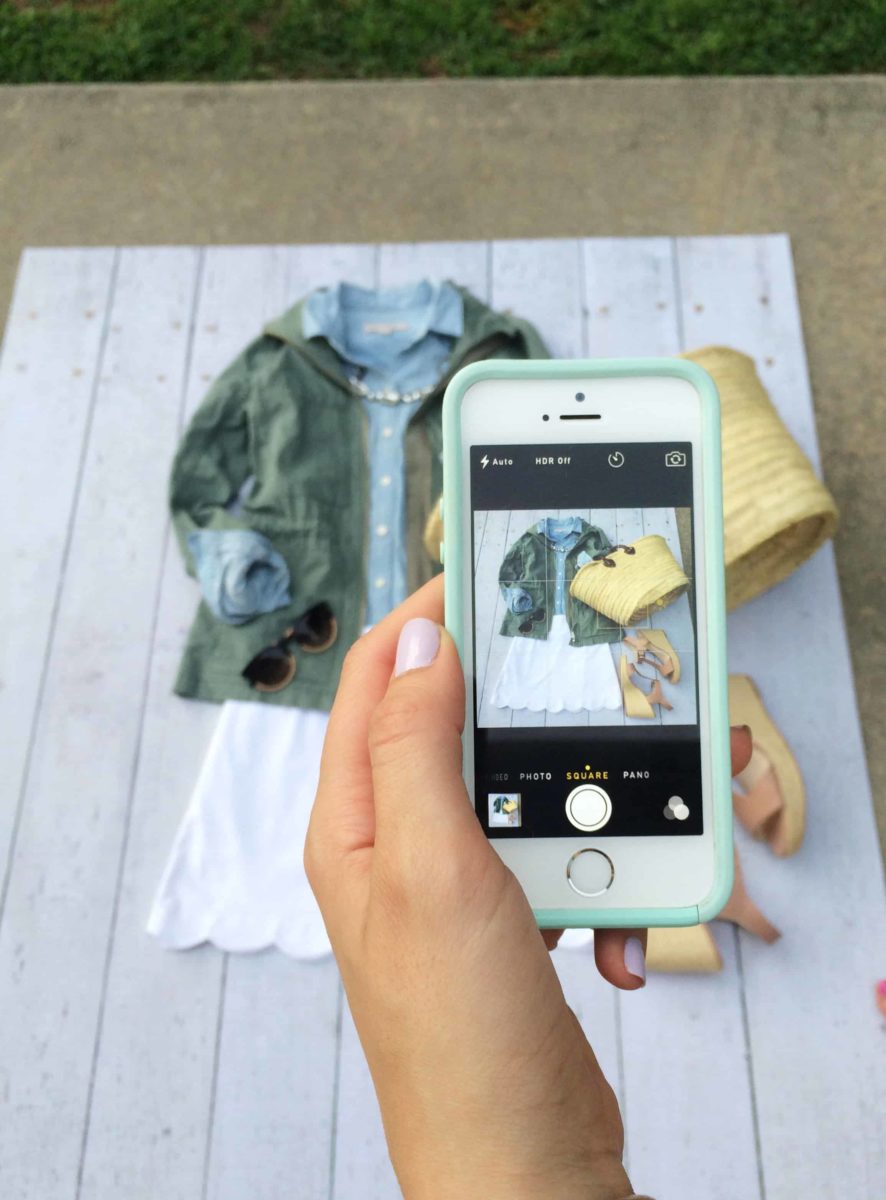
You ever see pictures like this on Instagram and you’re like “OOH, I can do that!”
 And then you take the picture and you realize – “errmm- mine doesn’t look like that, how did she do that?”
Well, today I’m going to share with you all the tips you need to take your flat lay photography tips to the next level! This is the ultimate guide to flat lay photography setup.
How to Make Flatlays on Instagram
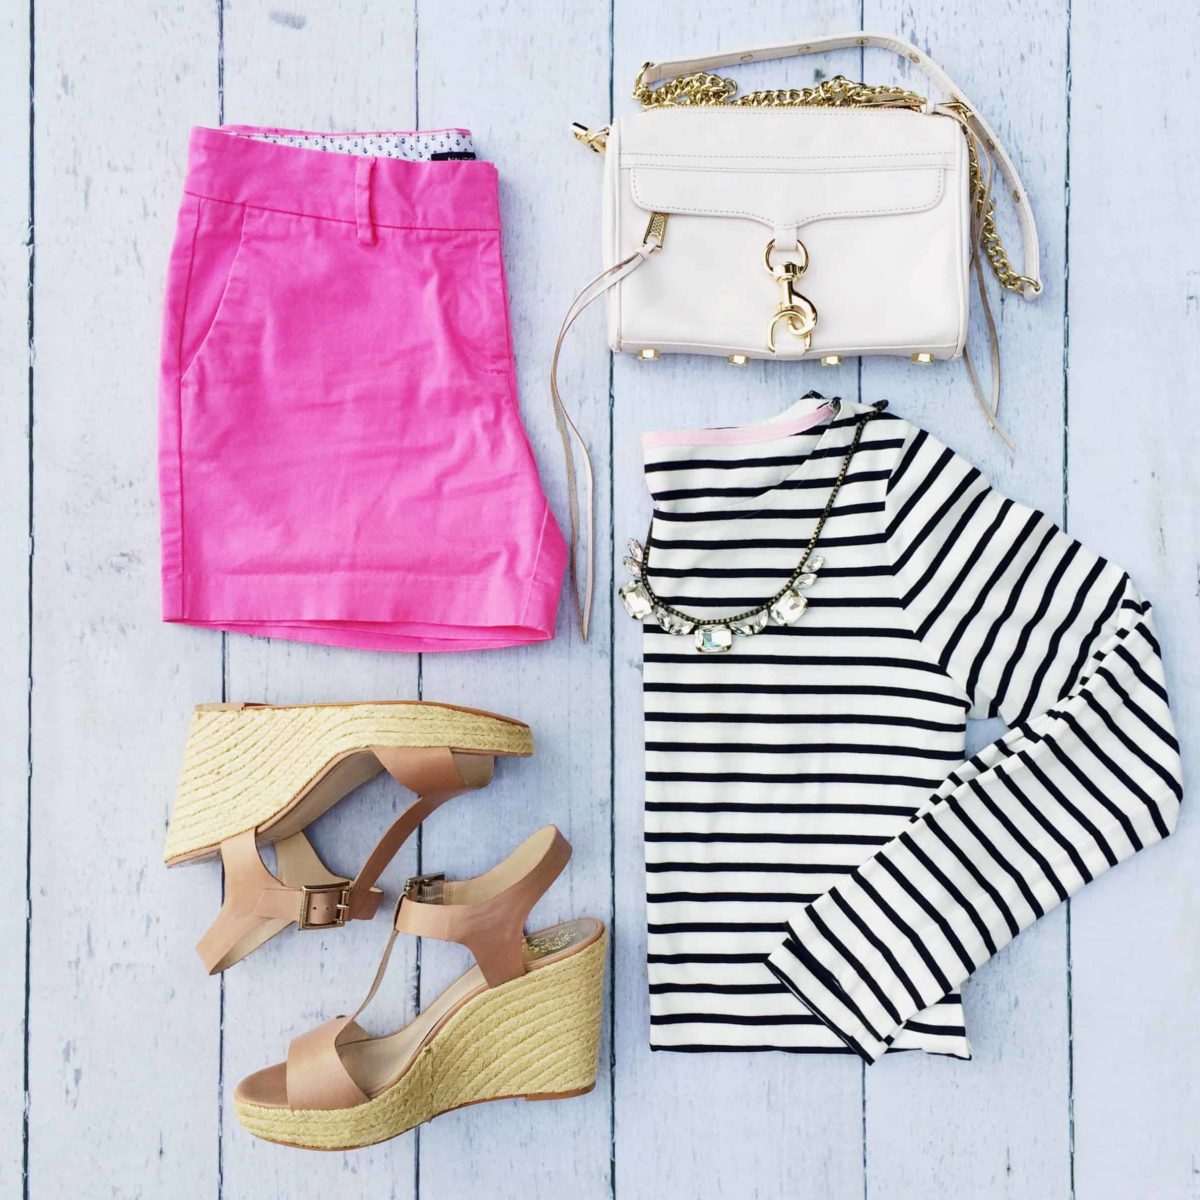
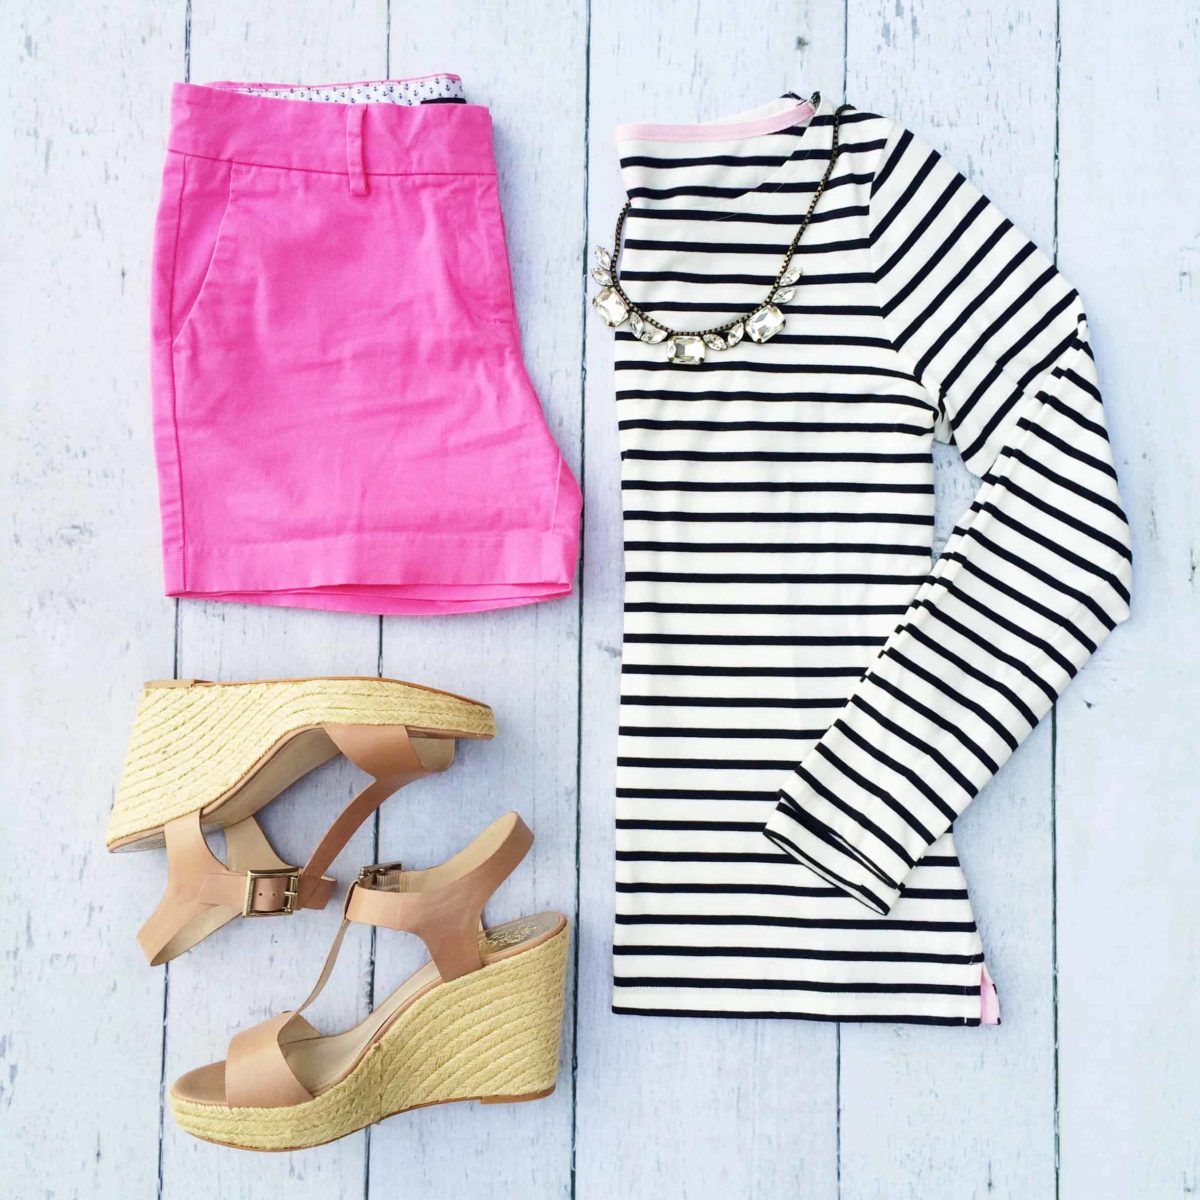
Shorts || Striped Top || Necklace || Purse || Wedges

No. 1: Choose your Subject
What’s the highlight of the picture? Want to show off a new pair of shoes you got? Necklace? Loving stripes right now? Choose something to focus on and build an outfit around that item. I am a sucker for stripes and pink (hi this whole blog design) so I wanted to focus on keeping the picture simple (since stripes are busy enough) by not crowding it with too many accessories. To me, the top picture looks better than the second picture because it’s not overdone with the addition of the cross-body purse.
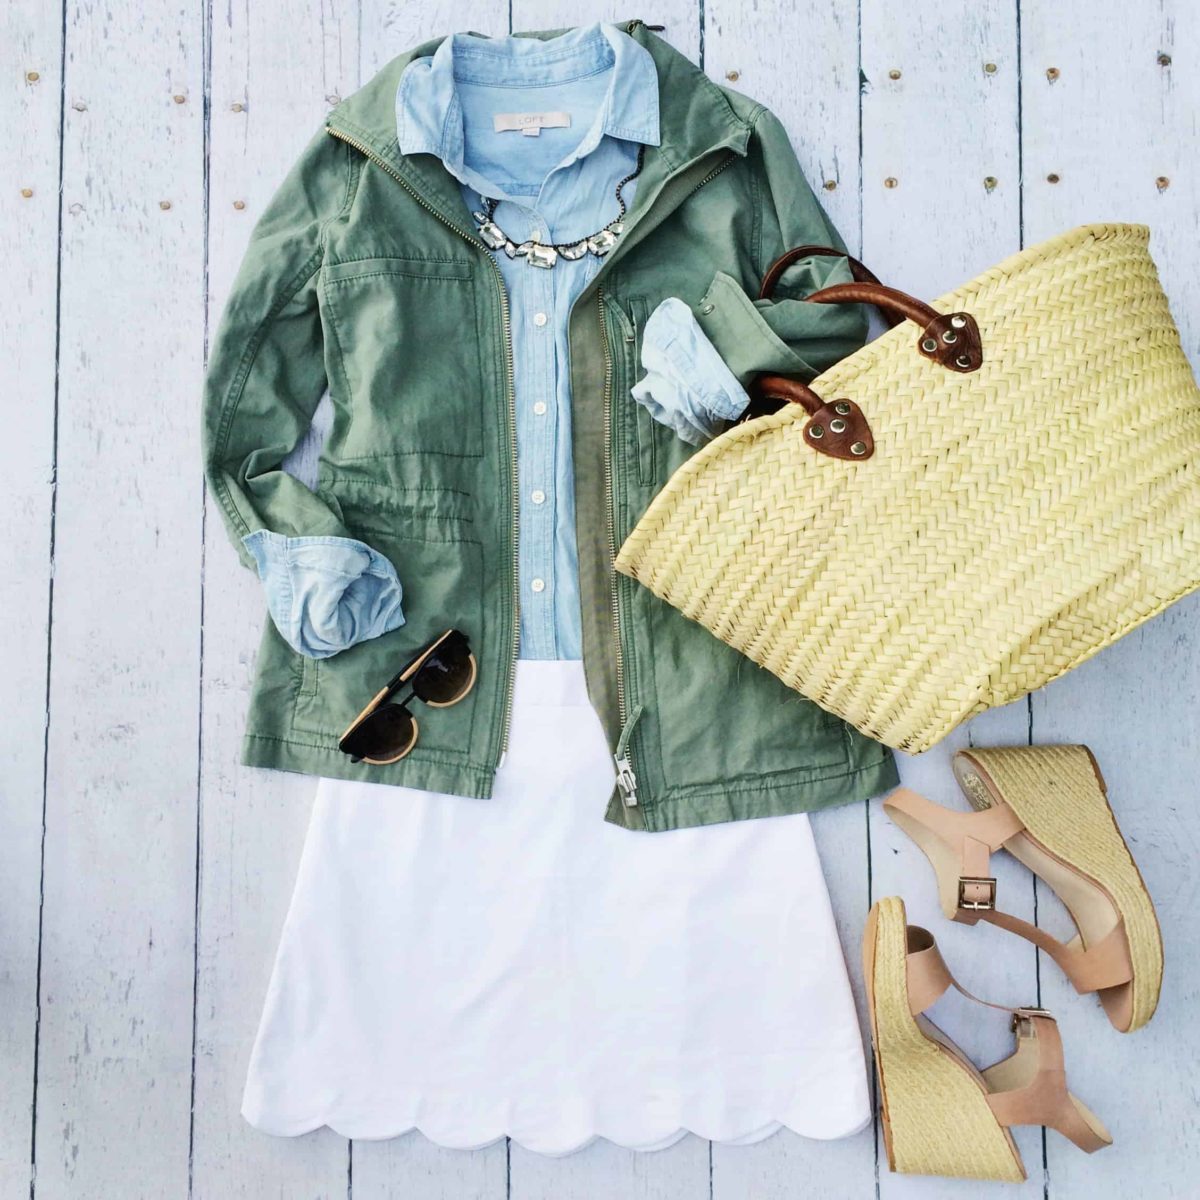
White Skirt (similar) || Button Up Chambray || Madewell Olive Green Jacket || Wedges || Market Bag || Necklace (similar) || Sunglasses
No. 02: Balance is Key
Make sure that you balance out large items with more dainty items so you don’t end up with a bundled mess. This green Madewell jacket is actually pretty boxy when laid down, so I tucked the sides into the waist (to give it a more hourglass shape as how it fits on my body) and paired it with a white mini skirt to make it more summer friendly.

White Skirt (similar) || Button Up Chambray || Madewell Olive Green Jacket || Wedges || Market Bag || Necklace (similar) || Sunglasses
No. 03: Arrange and Re-Arrange
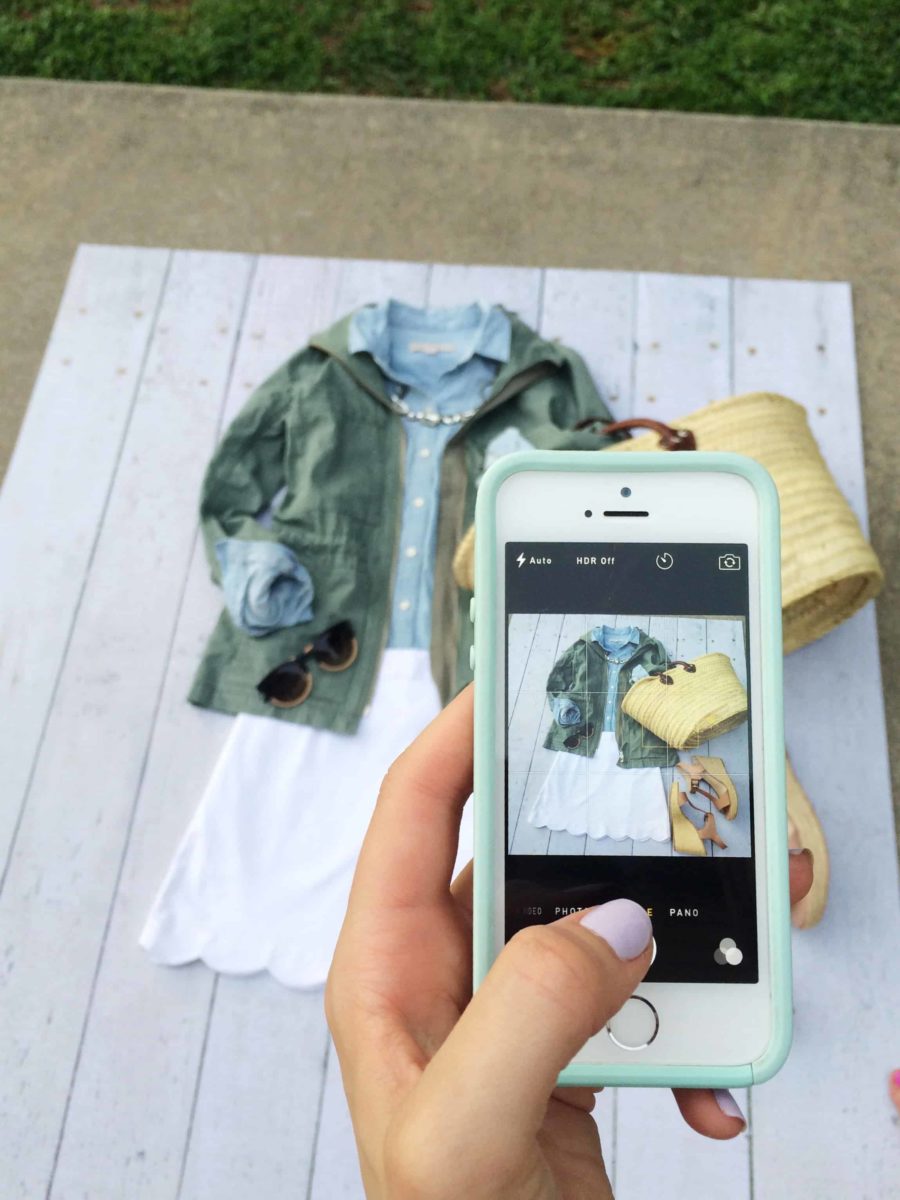
I rarely take just one picture when I’m doing a flat lay. Sometimes I notice the picture causes a shadowy wrinkle, others may just look disproportionate, and some I just don’t like. So to make sure I get the perfect shot, I take multiple pictures while rearranging the items in the picture. You may notice from the first and the second, I ditched the sunglasses and moved the wedges to the left side of the picture to balance out the straw tote. This created much more symmetry for the eye and is, by marketing standpoints, more appealing.
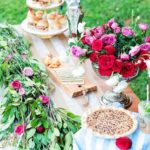
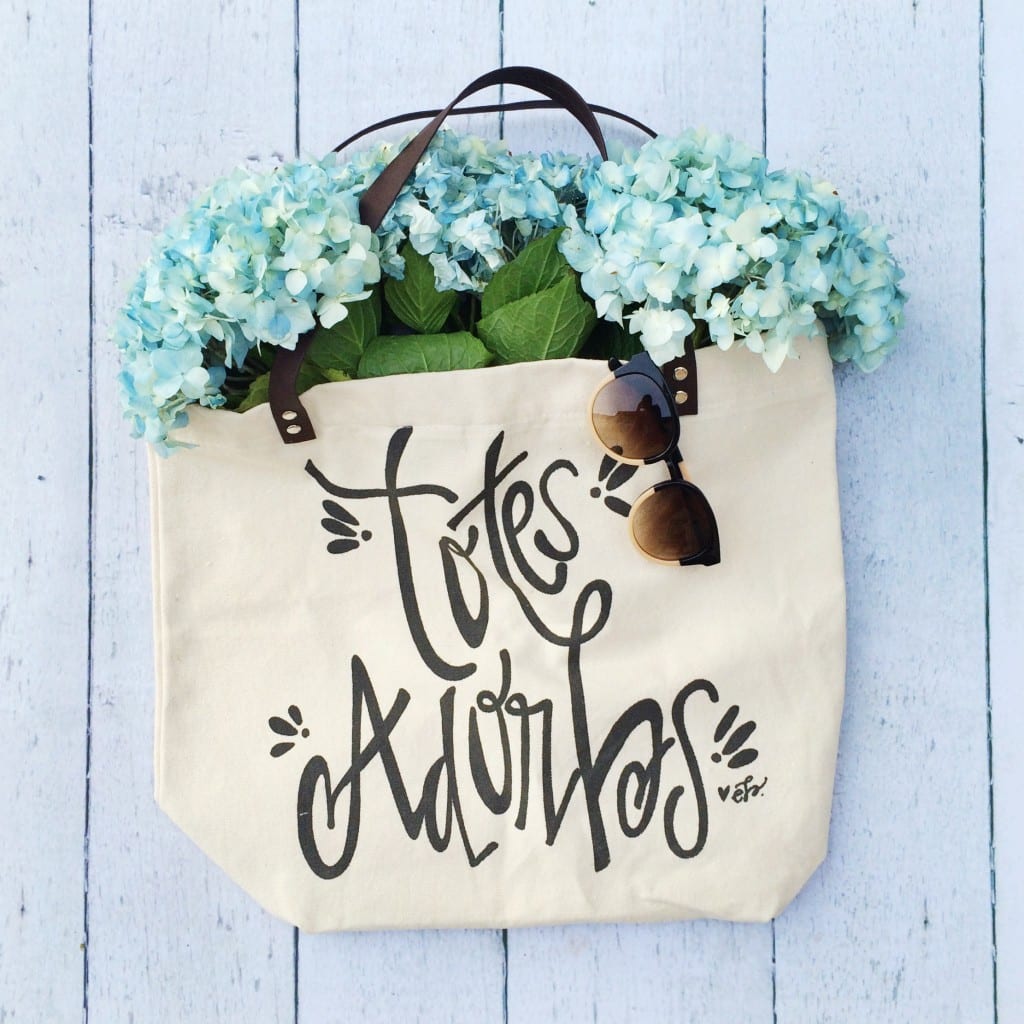 No. 04: Pick a Color Scheme
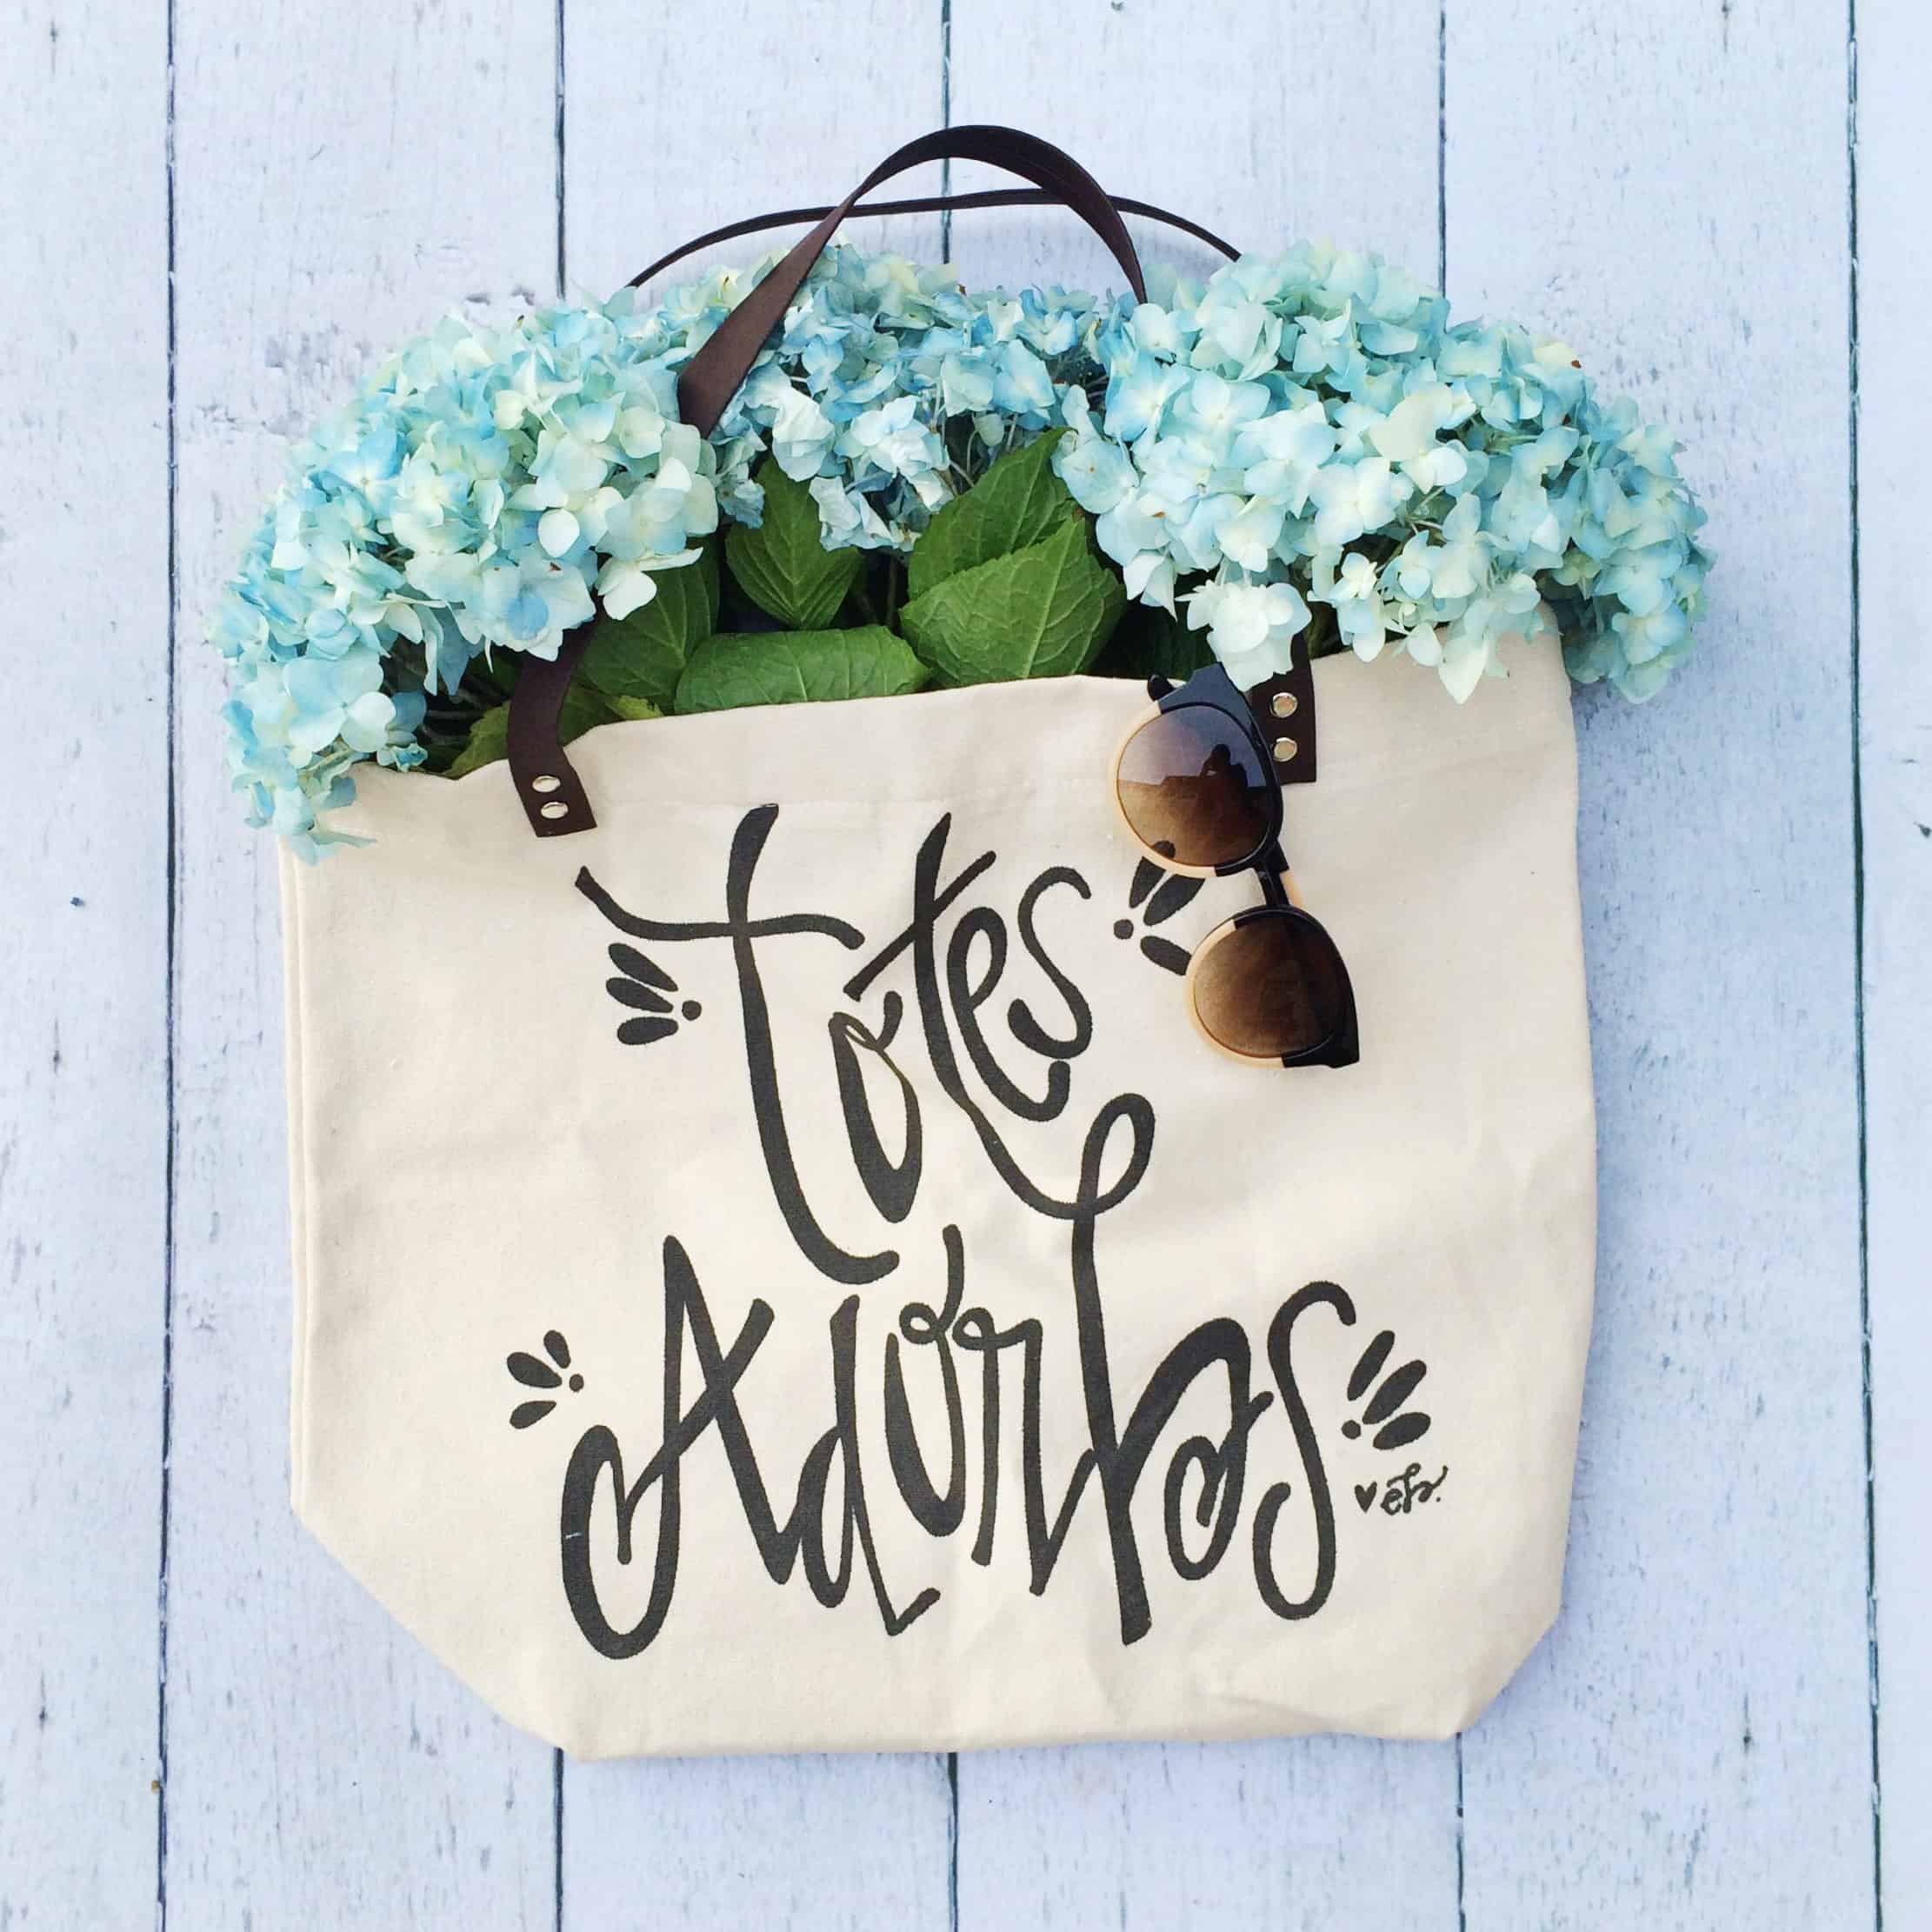
Colors can help evoke emotions, so pick a color that goes for the mood you are trying to convey. Summertime is all about blue hydrangeas (especially if you live on the East Coast), so these made the perfect statement color for the photo. To me, it screams: Totes Adorbs.
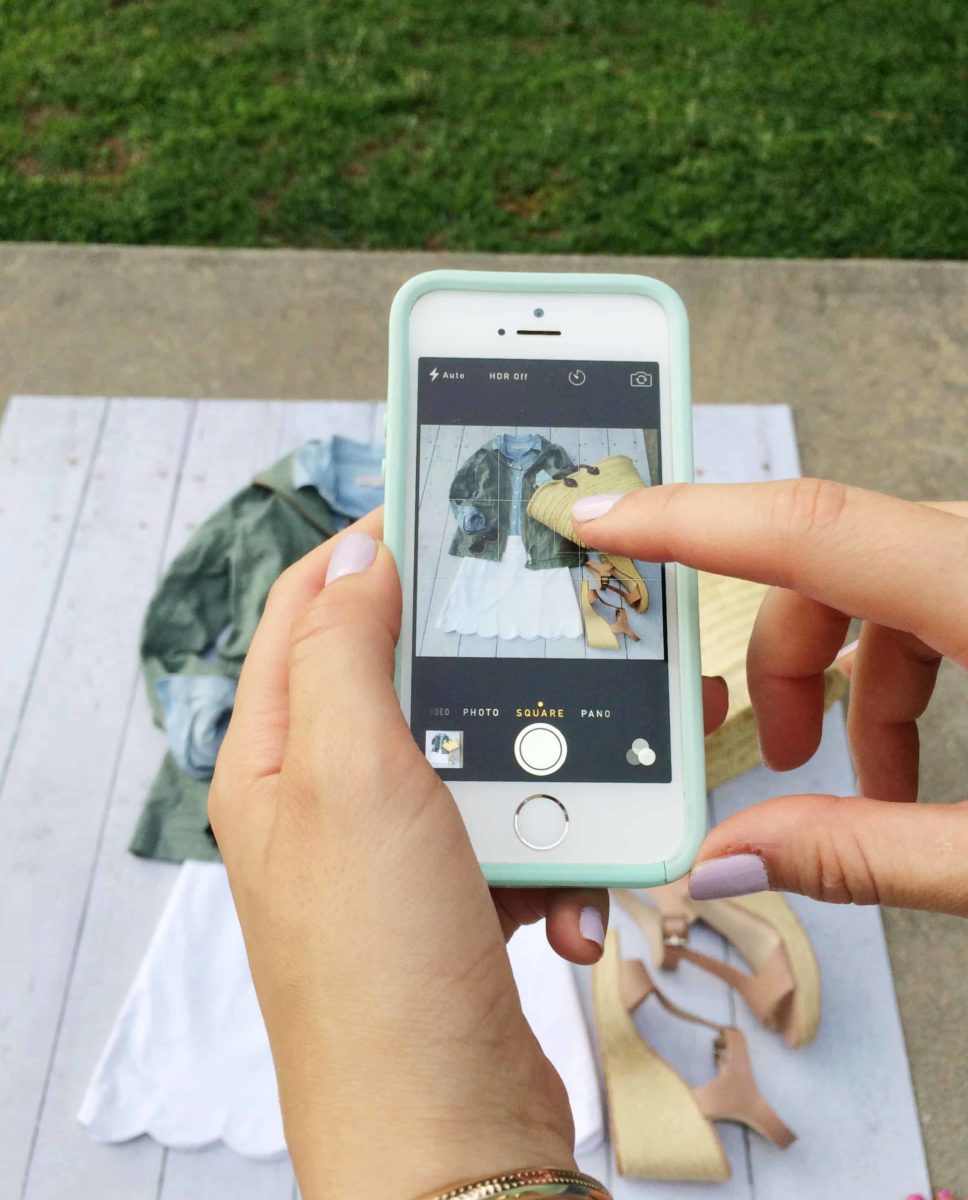
 No. 05: Don’t Shoot on Square Setting
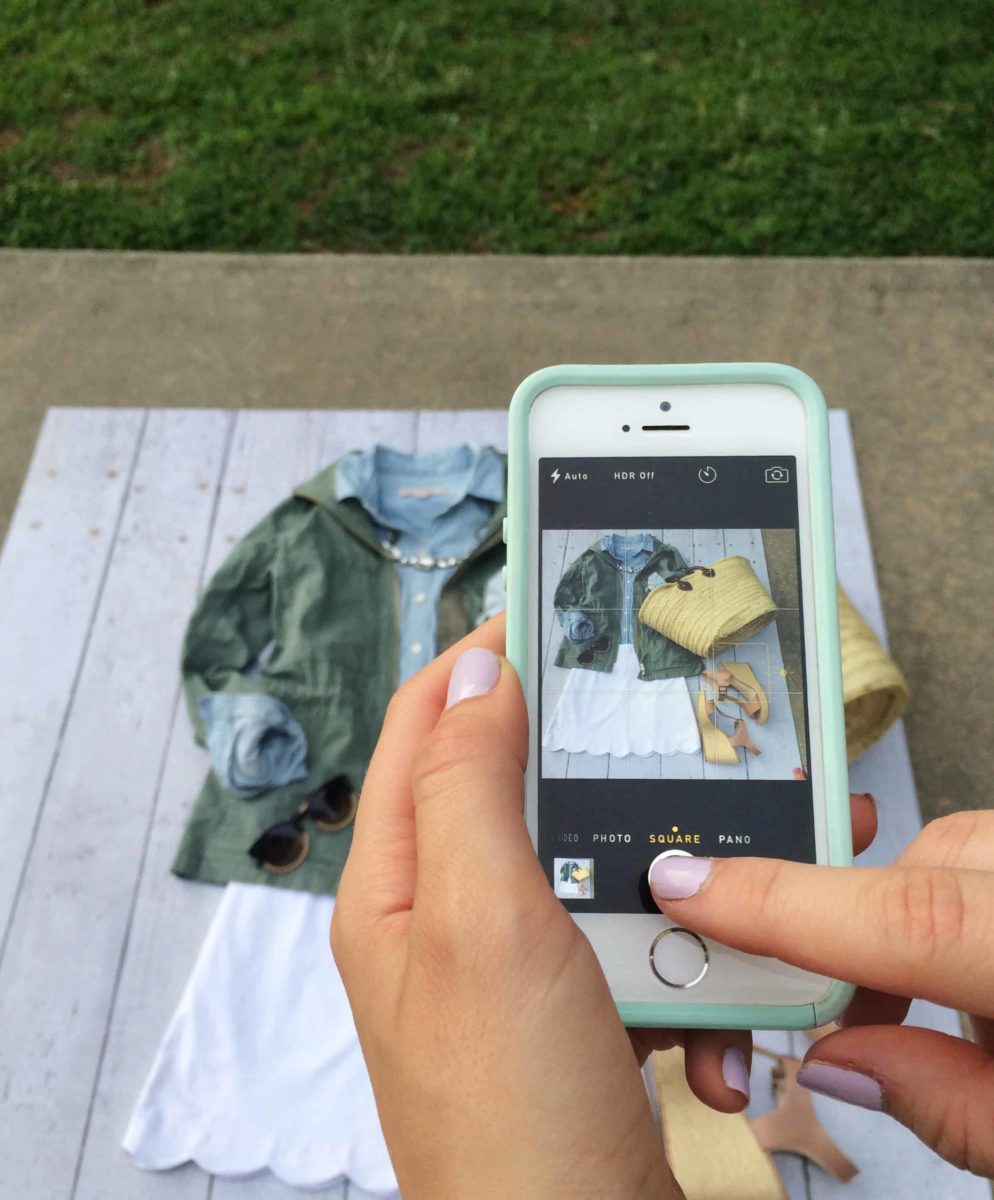
Now that Instagram lets you upload a larger photo than just Square utilize as much space as you can! It’s proven that an image that is outside of the square setting gets better engagement than one that is shot on square. You also will have more of a canvas to work with when shooting on the standard photo frame. Instagram does have a limit of only uploading a photo size that is 1080 pixels by 1920 pixels, so make sure you are uploading an image at least that large to get the right clarity while viewing it in the app.
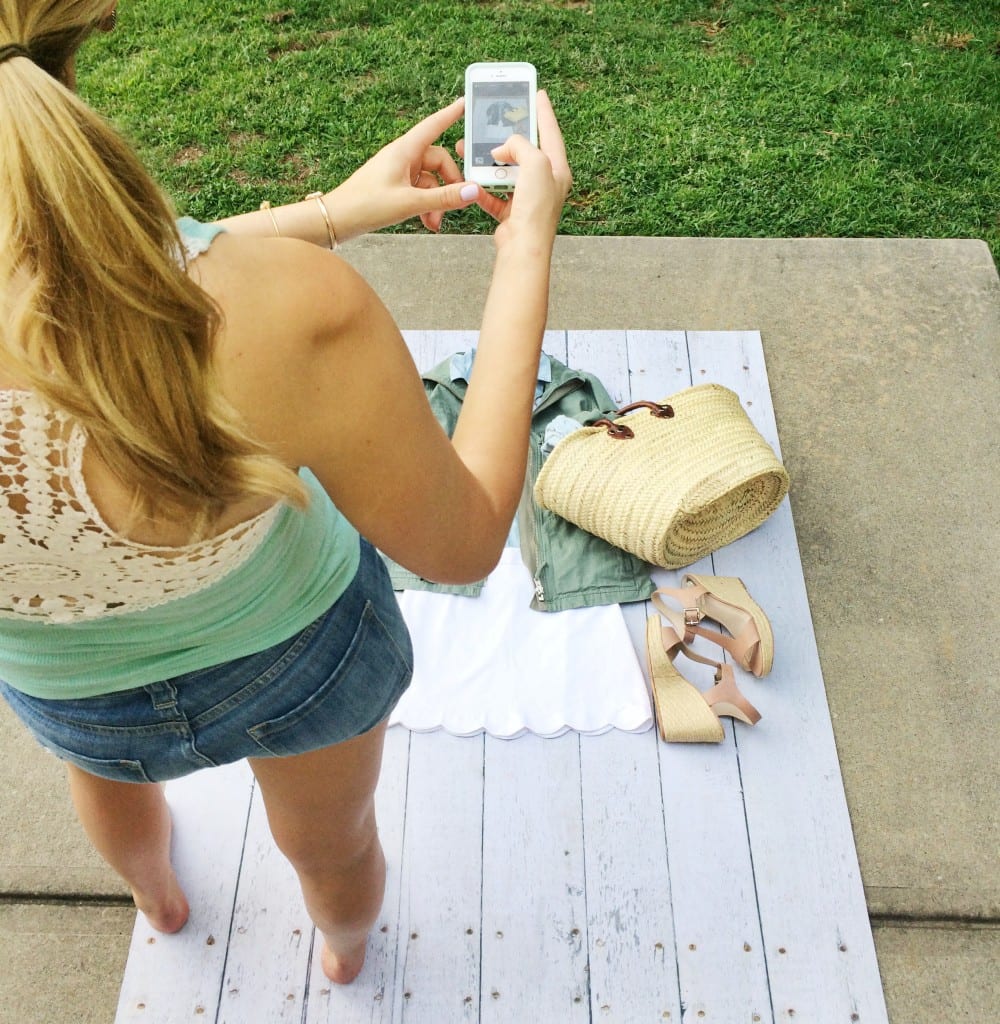 No. 06: Get High Above your Subject

Nature graced me with height, so I don’t typically have to stand on a stool or my tippy toes to get enough height to capture the entire shot. But if you need, make sure you get enough height between you and your subject so that the entire focal point can be in the frame. Also the further away you are, the better chances you have to adjust the straightness of the photo without compromising the picture itself.
No. 07: Only use Natural Light
Good lighting is hard to come by inside unless you’re willing to buy expensive lighting kits and setups. My favorite thing to do is take my subject outside in either early morning or later at night right before the sun is setting. Anytime between then, you can’t shoot in direct sunlight or you may get odd shadows and extreme color saturation. So if you can, plan your outfits beforehand, and then take the shots during the “golden hours”. If you still think the picture needs more “oomph” after you’ve taken it, upload it to the app “PS Express” and adjust the brightness. For free this app has been as amazing as Photoshop without uploading it to your computer! I can’t recommend it enough!
No. 08: Have a Neutral Background
The biggest game-changer I have noticed between successful flatlays and unsuccessful ones were the backgrounds they laid on. Everyone wants that perfect white background or white marble for their photos, but marble is expensive and contact paper gets messy easily. There are a ton of great background companies to choose from and you can even get creative with your background like this whitewash “wood floor” lookalike. I like using Vinyl mats because they are easy to transport. If you’re looking for certain backdrop options, check out the list below of popular backdrops.
Plaster Texture Wall Paper (hint put it on a piece of particle board or foam core)
Marble Tile reversible with White Marble
Green & Gold textured backdrop


I had no idea that was a rug that you’ve been using! What a great idea. This was such a helpful post for me. I have absolutely no eye for composition (Matt helps with that) when the items aren’t on a person. Love!
Yep! I was trying to keep it a secret until this post went live, but it’s a rug! And it’s worth EVERY PENNY. Make sure you enter the giveaway and you could win one!
I love this post! You stand out amongst bloggers for your useful posts, keep it up! 🙂
Aw thanks girl! That’s so sweet of you to say! xo
I’ve tried to do flatlays, and mine definitely never turn out this pretty! I love the textured background of your picnic table. I need one of those! Great tips, and thank for the giveaway!
the “picnic table’ is actually a rug! Good luck!
I can’t believe that is a rug! How cool! Thanks for sharing!
Yes ma’am! Make sure you enter the giveaway! it’s a great backdrop!
Wow what a cool rug! I really thought you were standing on a picnic table to get that photo!
xx,
Susie
http://www.SequinsandStrawberries.com
Nope! It’s a rug and it’s AWESOME! Make sure to enter the giveaway!
This is a great post, I definitely don’t feel like I am very good at taking these pretty arranged instagram pictures. Just need to keep trying, thanks for the tips 🙂
I can’t believe that’s a rug! I’ve been trying to find a good background for while, but no luck until I saw this. Thanks for the amazingly helpful flatlay tips, really. Tried googling it once, but nothing useful came up. I’m so glad I found your blog! Crossing my fingers for the giveaway 🙂
I can’t believe that’s a rug! I’ve been trying to find a good background for while, but no luck until I saw this. Thanks for the amazingly helpful flatlay tips, really. Tried googling it once, but nothing useful came up. I’m so glad I found your blog! Crossing my fingers for the giveaway 🙂
(sorry for a repeat comment, my blog URL wasn’t right)
No worries! Thanks for stopping by Sanika! Keeping my fingers crossed for you <3
I never would have guessed that was a rug!!! Great tips!
Thanks!
~Rose
http://babiesandbluejeans.blogspot.com
Right? It looks so real! Hope you enjoyed the post!
Great tips! Natural lighting & a good background are always good. Those are the things I need to work on with my photos, clothing or not!
Glad you enjoyed the post!
Loved this post! Very helpful. Can’t wait to try it out.
I’m glad you enjoyed the post! Hope you entered the giveaway going on!
Seriously the coolest concept. I followed all of the directions and entered in every way possible. I need one of these faux wood rugs!
I was so surprised to hear that was a rug! Blew my mind! Thank you for this post!
Isn’t that crazy? They have a lot of other amazing patterns you should go check out!
Hi Cynthia, I just came across this wonderful post about flatlays and the secret weapon!! Never in a million years would I have though that was a rug!! Thanks so much for sharing this with us 🙂 Quick question – is the size you have linked (23” by 36”) the one you actually have? It looks pretty spascious from you pictures above but I just wanted to confirm that it is a good size for flat lays in general? Sometimes I find myself in need of extra room to spread out the clothes and what not. Thanks again 🙂
Hi Cynthia, I just came across this wonderful post about flat lays and the secret weapon!! Never in a million years would I have though that was a rug!! Thanks so much for sharing this with us 🙂 Quick question – is the size you have linked (23” by 36”) the one you actually have? It looks pretty spacious from you pictures above but I just wanted to confirm that it is a good size for flat lays in general? Sometimes I find myself in need of extra room to spread out the clothes and what not. Thanks again 🙂
I got the 46 x 66 rug! Hope that helps!
Just dipping my toes into flatlay waters with Soulshine Boutique…eek! Your tips are great! Thanks for sharing! xo
So glad they could help you out Lisa! That was my goal with the post! Best of luck to you and your boutique!
Thanks for the tips! I am just starting to create flatlays and I will be getting up the mornings to create beautiful photos like yours (:
xoxo
Isaly Holland
http://www.memoriesbyisaly.com
Hi Islay,
So glad these tips could help! best of luck on your new endeavor!
xo
Cynthia
Hi! I’m so glad I found your blog and I love your tips you shared. I would like to know, what size is your rug that you used in this post?
The rug is the largest size that the company had availabe, so a 5X8 i believe?
Love the tips! & I was not expecting that to be a rug. I thought it was a bench. Lol
I’m glad you found the post helpful! Isn’t it great! There are also a lot of background from a store called Ink & Elm that I like using for backdrops as well. I sadly don’t have the rug anymore, but it was great for the two years I had it!
Love the rug! Totally thought you had reclaimed a pallet of wood or something bc it’s sooo realistic looking. Also, thank you so much for the tip about the times of day you go out bc I always have a dreadful time finding the perfect time to head when the lighting is just right. Great read, very helpful!
Good to know you enjoyed these tips Kim! Happy photographing!